Can you paint recessed lighting trims to match the ceiling? In many homes, the answer is yes, but the method matters. A white trim against a warm ivory ceiling can look surprisingly noticeable. Painting it may create a cleaner, quieter ceiling line. However, recessed trims are not ordinary decorative pieces. Their finish, ventilation, and reflective surfaces can affect light output and heat management.
Lighting designer Randall Whitehead offers a useful principle: “The light should serve the room, not compete with it.” That idea applies directly here. A matching trim can reduce visual contrast, but careless paint may cover apertures, clog adjustment parts, or dull the beam. The result might look better while performing worse. That is the part many quick tutorials miss.
This article examines whether painting recessed lighting trims is practical, safe, and visually worthwhile. It considers metal, plastic, and flame-rated trims separately. It also explains when removal is sensible, which primers adhere properly, and why heat-resistant finishes deserve attention. Never paint the bulb, socket, interior reflector, or ventilation openings. Turn off the circuit before removing any trim, and follow the manufacturer’s instructions.
A small test helps. Paint one spare trim, reinstall it, and inspect the ceiling after dark. Notice shadows, glare, and color changes. The finish may not match perfectly. That is acceptable, because ceilings rarely have one uniform tone. The goal is not flawless camouflage. It is balanced, durable lighting that still performs as designed.
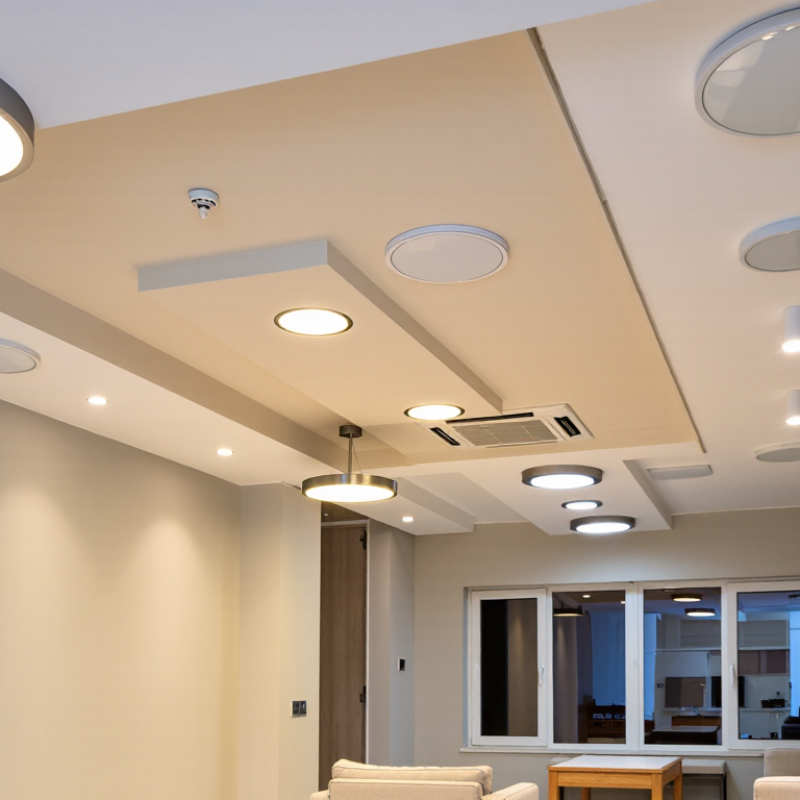
Recessed lighting trims are the visible rings, baffles, or reflectors surrounding a ceiling light. They hide the ceiling cutout and shape the light beam. A white trim can spread soft light, while a dark baffle can reduce glare and create sharper contrast. The trim is not the entire fixture. The housing above the ceiling contains wiring, insulation barriers, and heat-control components.
Painting matters because color changes both appearance and light performance. The U.S. Department of Energy reports that lighting uses about 15% of an average home’s electricity. A poorly chosen coating may reduce reflectance, especially inside a reflector, making a room feel dimmer. Paint can also cover labels, clog small ventilation openings, or interfere with spring clips. I have seen otherwise careful renovations fail because painters treated the trim like ordinary metalwork.
Remove the trim when possible, clean it, and use a thin coating suited to its material. Avoid painting the socket, wiring, insulation-contact surfaces, or any heat-release opening. Follow the fixture’s installation instructions, and let the coating cure fully before reinstallation. The National Electrical Code requires luminaires to be installed according to their listing and instructions, so decorative changes must not defeat certified safety conditions. The DOE also notes that LED lighting can use at least 75% less energy than incandescent lighting, but efficient LEDs still produce heat. I would not paint a sealed-in-place trim without checking its temperature rating. That extra inspection feels slow. It is cheaper than replacing a damaged fixture. (Sources: U.S. Department of Energy, Energy Saver; National Electrical Code, Article 410.)
Before painting a recessed lighting trim, remove it and inspect both sides under bright light. Do not judge by appearance alone. A metal trim usually accepts paint better than a soft plastic or heat-sensitive coating. Check for a material label, installation sheet, or heat-rating information. If the surface feels rubbery, flakes easily, or leaves powder on your fingers, painting may fail.
Clean the trim with mild detergent and remove grease, dust, and ceiling residue. Let it dry completely. Lightly scuff a glossy metal surface with fine abrasive paper, but avoid deep scratches. For plastic, use a primer specifically made for heat-resistant plastic. Test the primer and paint on the hidden underside first. Wait several hours. Press adhesive tape against the test area and pull it away slowly. Peeling paint means the coating is unsuitable.
Keep paint away from the lamp socket, wiring, spring clips, ventilation openings, lenses, and rubber gaskets. Thick paint can interfere with movement or reduce heat dissipation. Never paint a trim while it is installed or warm.
I have seen small drips harden around adjustable parts, creating an annoying fit problem. That detail is easy to miss. If the trim becomes unusually hot, smells during operation, or lacks clear material information, pause the project and consult the installation instructions or a qualified electrician.
Yes, recessed lighting trims can often be painted, but the material matters. Steel and aluminum trims need a screwdriver, microfiber cloth, mild degreaser, 400–600 grit sandpaper, painter’s tape, and a tack cloth. Plastic trims require a plastic adhesion promoter. I once skipped this step, and the finish peeled near the lamp opening. That mistake was avoidable.
Use a water-based acrylic enamel or a heat-rated coating made for metal or plastic. Choose thin, even coats instead of one heavy layer. A small foam roller works well on flat surfaces, while an angled brush reaches narrow edges. Remove the trim before painting, switch off the circuit, and let the fixture cool completely. Never coat sockets, insulation-contact labels, gaskets, reflective interiors, or thermal protection parts. These areas are functional, not decorative.
The U.S. Department of Energy reports that LED lighting uses at least 75% less energy and lasts up to 25 times longer than incandescent lighting. Lower heat helps, but it does not make unsuitable paint safe. Paint only the visible trim, and follow the fixture’s installation instructions. A 2023 U.S. Department of Energy solid-state lighting report also emphasizes thermal management as a key performance factor. The overlooked detail is clearance. Even a neat finish can interfere with ventilation. My practical test is simple: inspect the trim after several operating cycles. If it smells, softens, or changes color, the coating choice needs reconsideration.
Yes, you can paint recessed lighting trims, but paint only the removable trim. Never coat the socket, wiring, reflector, thermal label, or ventilation openings. The U.S. Department of Energy reports that LEDs use at least 75% less energy than incandescent lamps. However, efficient lighting still needs proper airflow and safe installation.
Switch off the breaker, then confirm the circuit is dead with a voltage tester. Remove the bulb and gently release the spring clips. Take a quick photo first. It prevents confusion later. Wash the trim with mild detergent and let it dry completely. Lightly sand glossy surfaces with 220-grit paper, then remove all dust. Apply a thin bonding primer, followed by two light coats of heat-resistant paint. Heavy paint can sag, crack, or cover important edges.
Allow the trim to cure according to the coating instructions before reinstalling it. Keep paint away from the trim’s insulation gasket and any moving clips. The National Fire Protection Association recorded about 32,600 U.S. home fires involving electrical distribution and lighting equipment annually from 2016 to 2020. That figure makes careless reassembly difficult to justify. Check that the trim sits flat and the clips hold firmly. Older clips may feel weak, and I would replace them rather than force them. Test the light briefly, then inspect for rubbing, odor, or unusual heat. The first coat may look uneven. That is normal, but rushing the second coat usually makes it worse.
Yes. Metal recessed-lighting trims can usually be painted after removal, cleaning, light sanding, priming, and applying thin coats of compatible paint. The chart shows typical hands-on time for a small trim-painting project.
Times are typical homeowner estimates for one or several trims. Always follow the paint, primer, and lighting-fixture manufacturer’s instructions, especially for heat resistance and curing time.
Can you paint recessed lighting trims? Usually, yes, but only after removing the trim and checking its material. Metal and heat-rated plastic trims may accept suitable paint. Never coat the socket, wiring, insulation contact, labels, or ventilation openings. Switch off the breaker, confirm no power with a tester, and let the fixture cool completely. OSHA 1910.333 emphasizes de-energizing exposed electrical parts before servicing. This rule matters, even during a small decorating project.
Heat management is the common mistake. A thick paint layer can block vents or hide warning labels. Spray paint can also drift inside the housing. The U.S. Department of Energy reports that LEDs use at least 75% less energy than incandescent lamps, yet every fixture still needs proper heat release. Lower wattage does not mean zero risk. NFPA’s Home Structure Fires report for 2016–2020 found electrical distribution and lighting equipment involved in 24% of reported home fires. That figure deserves respect. I would not paint an installed trim simply to save ten minutes.
Tips: Remove the trim, clean grease with a suitable degreaser, and lightly sand glossy surfaces. Use thin coats, not one heavy coat. Keep paint away from spring clips and contact points. Let the trim cure fully before reinstalling it. If the surface becomes unusually hot, smells burnt, or shows discoloration, stop and ask a qualified electrician to inspect the fixture. A missed detail can matter.
It is the visible ring, baffle, or reflector around a ceiling light. It hides the ceiling opening and shapes the light beam. It is not the complete fixture.
Many metal trims can be painted carefully. Plastic trims need compatible primer and heat-suitable paint. Check the material first. Appearance alone can mislead.
Color affects brightness, glare, and room contrast. Dark paint may reduce reflected light inside a reflector. A room can feel dimmer afterward.
Remove the trim and inspect both sides under bright light. Look for material labels and temperature information. Avoid surfaces that feel rubbery, flaky, or powdery.
Use a microfiber cloth, mild degreaser, fine abrasive paper, and painter’s tape. Metal usually needs suitable enamel or heat-rated coating. Plastic may need an adhesion promoter.
Turn off the circuit and let the fixture cool completely. Clean away grease, dust, and ceiling residue. Lightly scuff glossy metal without creating deep scratches.
Keep paint away from sockets, wiring, spring clips, lenses, and rubber gaskets. Do not cover ventilation openings or reflective interiors. These parts have practical jobs.
Apply primer and paint to a hidden underside area. Let it dry for several hours. Press tape onto the test patch, then pull slowly. Peeling means the coating is unsuitable.
Use several thin coats instead of one heavy coat. A small foam roller suits flat areas. An angled brush reaches narrow edges. Thick paint can block movement or heat release.
Let the coating cure fully before reinstallation. Watch the trim during several operating cycles. Stop if it smells, softens, overheats, or changes color. I might have rushed this inspection once. That was unwise.
Recessed lighting trims are the visible rings or covers surrounding ceiling lights, and their color can strongly affect the overall appearance of a room. Before painting, check whether the trim is made of metal, plastic, or another heat-resistant material, and confirm that it can be safely removed. Many homeowners ask, “can you paint recessed lighting trims to match the ceiling,” and the answer is often yes when the correct preparation and heat-resistant coating are used. However, some trims have special finishes or damage that may make painting unsuitable.
The process generally involves turning off the power, removing the trim carefully, cleaning away dust and grease, lightly sanding glossy surfaces, and applying a suitable primer and paint in thin, even coats. Allow each coat to dry fully before reinstalling the trim. Use proper ventilation, protect the ceiling and floor, and never paint while the light is energized or hot. Common mistakes include blocking ventilation openings, using ordinary paint near heat, applying excessively thick coats, and reinstalling the trim before it has completely cured.
Jable Light