How to Fix LED Downlights That Buzz When Turned On

Time:2026-09-27 Author:Henry
0%

A buzzing LED downlight can turn a quiet room into an irritating electrical rattle. The sound may begin the moment you flip the switch. Sometimes it fades after a few seconds. Sometimes it grows louder when the light is dimmed.

So, why do led downlights buzz when turned on? The cause often sits inside the driver, dimmer, or wiring connection. A poor-quality driver may vibrate as it converts incoming electricity. An incompatible dimmer can create unstable current pulses. Loose connections may also produce noise, heat, or flickering.

Lighting engineer James Benya offers a useful warning: “The dimmer, driver, and lamp must work as one system.” That principle explains many failures that look mysterious at first. An LED lamp may work perfectly in one room, then buzz in another room with a different dimmer.

I once assumed the bulb itself was always defective. That assumption was too simple. Testing the same downlight on a standard switch often reveals the real problem. The hum can disappear immediately.

This guide explains how to diagnose and fix buzzing LED downlights safely. You will learn when to replace the lamp, check dimmer compatibility, inspect connections, or call a qualified electrician. Do not ignore a sharp crackle, burning smell, or warm switch plate. A faint hum may be annoying. Those warning signs may indicate a more serious fault. Even experienced DIY users can miss a loose terminal. Careful testing matters.
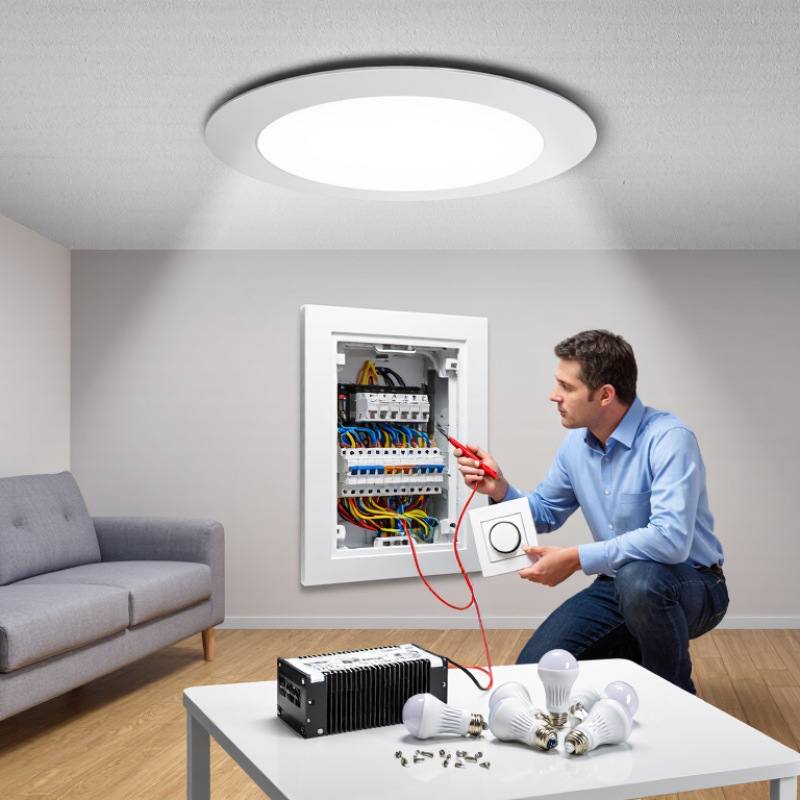
How to Fix LED Downlights That Buzz When Turned On

Identify the Cause of the Buzzing LED Downlight

A buzzing LED downlight can point to the lamp, dimmer, or wiring, so locate the sound before replacing parts. Stand clear of the fitting and listen from below. Does the noise come from the lamp, the wall switch, or above the ceiling? A faint, steady hum may come from the LED driver, the small unit that regulates power. A sharper rattle can suggest a loose lamp or trim vibrating in its opening.

Check whether the buzz changes when you adjust the dimmer. If it does, the dimmer may not work well with the LED lamp, even if both parts function on their own. Turn the light off before checking that the lamp sits firmly in its socket. Never remove a fitting or touch wiring while power is on. If the switch crackles, the light flickers, or the fitting feels warm, stop using it and contact a qualified electrician. Those signs need more than guesswork.

The sound may not come from the downlight itself. Nearby ductwork or a ceiling panel can amplify a small vibration. This check is not perfect; sound can travel through the ceiling and mislead you. Note when the buzz starts and whether it changes with dimming. That detail can help an electrician identify the cause without unnecessary part changes.

Turn Off Power and Check the Wiring Connections

A buzzing LED downlight can point to a loose connection, but the sound alone cannot confirm the cause. Turn off the circuit at the breaker, not just the wall switch. Do not rush. Use a suitable voltage tester to confirm the wiring is dead before opening the fitting; a switch can leave parts of a circuit live. If you cannot verify this safely, stop and call a licensed electrician.

Once power is confirmed off, inspect accessible connections for loose terminals, damaged insulation, or exposed copper. Gently check that each wire is held securely in its connector, following the fitting’s instructions. Do not pull hard on the wires or force a connector that does not fit. That matters. Keep the grounding connection intact where one is required, and refit the downlight only when all conductors are enclosed. I would not assume a visible loose wire is the whole problem; a buzzing driver or incompatible dimmer can sound similar. If the wiring looks scorched, smells burnt, or still buzzes after a careful check, leave the circuit off and get professional help.

How to Fix LED Downlights That Buzz When Turned On — Turn Off Power and Check the Wiring Connections

A buzzing sound can come from a loose connection, an incompatible dimmer, or a failing LED driver. Follow these checks in order, and do not inspect wiring while the circuit is energized.

Step What to Check How to Proceed Safely What the Result May Indicate
1. Isolate the circuit Identify the circuit supplying the downlight. Switch off the circuit breaker before removing a fitting or accessing a connection. Use an appropriate voltage tester to confirm the conductors are not live; do not rely on the wall switch alone. If you cannot identify or safely isolate the circuit, stop and contact a qualified electrician.
2. Inspect accessible wiring connections Look for a visibly loose, damaged, discolored, or overheated connector, cable, or terminal. Only inspect or handle wiring if you are competent and permitted to do so. Do not pull on conductors, bypass connectors, or touch exposed copper. Replace damaged components through a qualified electrician. A loose or heat-damaged connection can cause noise and may present a fire or shock hazard.
3. Check the dimmer Note whether the light is controlled by a dimmer and whether buzzing changes with the dimmer setting. With the fitting reassembled and the area safe, observe the sound during normal operation. Do not open or adjust the dimmer while power is on. Noise that changes with brightness can point to dimmer and LED-driver incompatibility or a dimmer that is not suitable for the load.
4. Check for a failing driver or lamp Listen for buzzing from the fitting and watch for flickering, delayed starting, or intermittent operation. Turn the circuit off before any replacement. Use only a compatible replacement specified for the fitting, and follow the fitting manufacturer’s instructions. Persistent noise or flickering after connection and dimmer checks may indicate a faulty LED driver or fitting.
5. Restore power and test Confirm that the fitting is properly reassembled and no tools or loose parts remain. Restore power only after covers are secure and the work area is clear. If buzzing continues, switch the circuit off and arrange an electrician’s inspection. A quiet, steady light suggests the issue may be resolved. Continued buzzing, heat, burning odor, or visible damage requires prompt professional attention.

Safety note: Mains wiring can cause electric shock, serious injury, or fire. If you are unsure how to isolate the circuit, verify it is de-energized, or assess a connection, do not proceed—use a qualified electrician.

Test the Dimmer Switch for LED Compatibility

A steady buzz from an LED downlight can point to a dimmer that was designed for older incandescent lamps. The two may work together, but not smoothly. Set the light to a comfortable brightness, then slowly move the dimmer toward its lowest setting. Notice whether the buzz changes, whether the light flickers, or whether it suddenly goes dark. Keep your hands away from the fixture and switch plate.

Check the dimmer’s label or instructions for LED compatibility and its minimum and maximum load. The bulbs also need to be dimmable; an LED that is not designed for dimming may buzz even with a suitable switch. Older dimmers can require more load than a small group of LEDs provides. That detail is easy to miss. If several downlights share the switch, check the total wattage against the dimmer’s stated range.

This test offers a clue, not a final diagnosis. A buzz that persists at full brightness may come from a loose component or another electrical issue. Don’t remove the switch plate or inspect wiring while power is on. If the dimmer is incompatible, have a qualified electrician install an LED-rated model suited to the lights and circuit. Compatibility charts help, though they do not always account for every fixture combination.

Replace Faulty Bulbs, Drivers, or Downlight Components

How to Fix LED Downlights That Buzz When Turned On

A buzzing LED downlight often signals a faulty bulb, driver, or loose internal component. The sound may resemble a faint mosquito or an electric hum behind the ceiling. I once replaced a bulb without checking the dimmer, and the noise returned immediately. That mistake showed me that compatibility matters as much as replacement.

Turn off the circuit breaker before removing the downlight. Confirm the wires are dead with a suitable voltage tester. Replace the bulb with one matching the fitting, voltage, wattage, and dimming requirement. Use a dimmable bulb with a compatible dimmer. Do not force a bulb into a warm or damaged socket. If the bulb works elsewhere but still buzzes, inspect the driver. A failing driver may produce heat, flickering, delayed start-up, or a sharp electrical smell. Replace it with the correct output rating and connector type.

Check the spring clips, terminal connections, and housing for movement. Loose parts can vibrate when current flows. Some downlights have sealed LED modules, so replacing the entire unit may be safer than repairing it. I have found that small cracks and browned insulation are easy to miss under poor lighting. That detail matters. Stop immediately if wiring looks burned, crushed, or altered. A qualified electrician should handle fixed mains wiring and confirm the replacement meets local electrical requirements. Do not keep resetting a tripping breaker.

Restore Power and Confirm the Repair Is Successful

How to Fix LED Downlights That Buzz When Turned On

Turn off the circuit breaker before touching the downlight or its wiring. Let the fitting cool completely. I once assumed a faint buzz came from the lamp itself, but the actual cause was an incompatible dimmer. That mistake taught me to inspect the entire circuit, not just the bulb. Check for loose connections, damaged insulation, poor lamp seating, or a dimmer that does not suit the light. Do not guess. If wiring looks burnt or loose, contact a qualified electrician.

After tightening approved connections, refit the downlight securely and replace its cover. Keep tools and hands away from the circuit. Restore power at the breaker, then switch on the light from a safe position. Listen closely. A properly repaired downlight should start without buzzing, flickering, delayed illumination, or unusual heat. Test the switch several times, including any dimming function. The light should respond smoothly at low and high settings.

Watch the fitting for several minutes. A quiet start is encouraging, but it does not prove the repair is permanent. I have seen a light remain silent briefly, then buzz after warming. If noise returns, switch off the breaker immediately and stop testing. Record what changed, including the dimmer setting and operating time. Never continue using a fitting that smells hot, flashes, or discolors the ceiling. A second inspection may reveal a deeper wiring or compatibility problem.

How to Fix LED Downlights That Buzz When Turned On

Restore Power and Confirm the Repair Is Successful

The bars show the order of the checks, not measured results. Turn off power before inspecting wiring or connections. Restore power only after the inspection is complete, then confirm the light operates steadily without buzzing and that its controls work normally. If buzzing continues, switch off power and consult a qualified electrician.

FAQS

What should I do before inspecting a buzzing downlight?

Turn off the circuit at the breaker and let the fitting cool. Confirm the wiring is dead with a suitable voltage tester. If you cannot do this safely, stop and call a licensed electrician.

Can buzzing alone identify the problem?

No. A loose connection, a buzzing driver, an incompatible dimmer, or poor lamp seating can sound similar. Don’t guess from the noise alone.

What should I look for after the power is off?

Check accessible connections for loose terminals, damaged insulation, or exposed copper. Look for scorch marks, too. Follow the fitting’s instructions and don’t force connectors.

Should I repair wiring if I see a loose or damaged connection?

Only handle approved connections if you can verify the circuit is safely isolated and follow the fitting’s instructions. If wiring looks burnt, exposed, or unclear, leave the circuit off and contact a qualified electrician.

How can I check whether a dimmer is causing the buzz?

Check whether the dimmer suits the light, then test its low and high settings after the fitting is securely refitted. The light should respond smoothly. Compatibility can be easy to misjudge.

How do I confirm the repair worked?

From a safe position, restore power at the breaker and switch on the light. Listen for buzzing and watch for flickering, delayed startup, or unusual heat.

How long should I watch the light after repair?

Observe it for several minutes. A quiet start is encouraging, but buzzing may return as the fitting warms.

What should I do if buzzing returns?

Switch off the breaker and stop testing. Note the dimmer setting and how long the light ran. If it smells hot, flashes, or discolors the ceiling, do not use it; get professional help.

Conclusion

If your LED downlights buzz when switched on, first identify when the sound occurs and whether it changes with brightness. Asking “why do led downlights buzz when turned on” can help narrow down common causes, such as a loose connection, an incompatible dimmer, a faulty bulb, or a problem with the light’s driver. Turn off the power at the circuit breaker before inspecting any wiring, and check that connections are secure. If you are unsure how to do this safely, contact a qualified electrician.

Next, confirm that the dimmer is designed to work with LED lights and adjust or replace it if necessary. Test the downlight with a compatible bulb, and replace any faulty bulb, driver, or other damaged component. Once the repair is complete, restore power and check that the light operates steadily without buzzing at different brightness levels. If the noise continues, switch off the circuit and arrange a professional inspection.

Henry

Henry

Henry is a dedicated marketing professional with a profound expertise in the company's offerings. With years of experience in the industry, he possesses an impressive understanding of the market dynamics and consumer behaviors that drive success. Henry is committed to sharing his insights through......