Surface mounted step lights improve visibility, but exposed wires can weaken an otherwise careful design. This guide explains how to hide wires for surface mounted step lights without sacrificing access, ventilation, or safety. It considers indoor stairs, outdoor steps, concrete walls, timber surfaces, and finished masonry. Each setting demands a different solution. A painted cable raceway may suit a hallway, while conduit offers stronger protection outdoors. Small details matter. Wire color, surface texture, junction-box placement, and light spacing can change the final appearance.
Reliable installation begins with planning, not concealment. Measure the cable route before drilling, and mark every bend with a pencil. Keep wiring away from sharp edges, moisture, and areas exposed to impact. For low-voltage systems, use compatible cable, connectors, and a properly rated driver. Disconnect power before handling any wiring. Local electrical requirements still apply, especially around exterior steps and damp locations. When the wall construction is uncertain, an experienced electrician should inspect it. Guessing can become expensive.
The ten approaches in this outline balance appearance, durability, and future maintenance. Some methods are quick but visibly imperfect. Others create a cleaner finish but require more preparation. I have learned that the neatest route is not always the safest route. A hidden cable that cannot be inspected may create problems later. Leave sensible access where possible. Test the lights at night, when uneven brightness and unwanted shadows become obvious. A little correction may be needed. That is normal. Good wire management should look intentional, remain secure, and support dependable lighting for years.
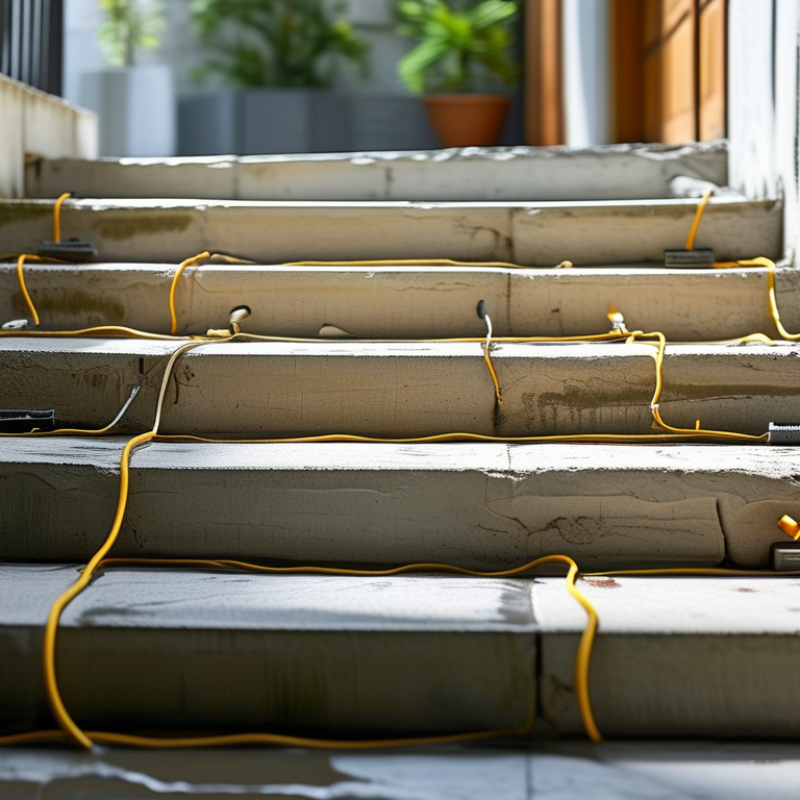
Assess the wall before choosing a hiding method. Mark studs, masonry joints, plaster thickness, and nearby electrical routes. A simple voltage detector helps, but it cannot replace professional verification. Surface-mounted step lights need a flat landing area, especially on textured walls. Measure every step, then draw the light layout at full scale. I usually mark each fixture with low-tack tape first. It exposes awkward shadows and uneven spacing early. That small test can prevent expensive patching later.
Choose wire paths that follow architectural lines. Conceal cables inside shallow channels, removable trim, or carefully planned conduit. On masonry, surface raceways may be safer than deep cutting. Keep junction points accessible, and leave service slack behind each light. The U.S. Department of Energy reports that LEDs use at least 75% less energy and can last up to 25 times longer than incandescent lamps. Lower heat helps, but it does not excuse poor cable spacing or weak connections. Local electrical rules still control conductor protection, box access, and low-voltage separation.
Plan the lighting pattern around walking movement, not decoration alone. Avoid placing a fixture where a hand, shoe, or cleaning tool can strike it. The International Energy Agency has reported that lighting represents roughly 15% of global electricity consumption, making efficient layouts worthwhile. Still, a perfect drawing can fail on an uneven wall. Leave room to revise. Check glare from standing height, then test the route at night before closing channels or trim.
Top 10 Ways to Hide Wires for Surface Mounted Step Lights
Paintable surface-mounted raceway offers a practical route for step-light wiring without opening finished walls. Measure the run carefully, then mark a straight line beside the stair trim. Keep the channel level. Small deviations become obvious after painting. Choose a raceway listed for the wiring method and voltage involved. NFPA 70, 2023, Articles 386 and 388, address surface metal and nonmetallic raceways. Their requirements cover conductor protection, fittings, grounding, and installation conditions.
Cut the raceway only after checking every bend and outlet location. Leave enough space for the conductors; crowded channels create heat and complicate future repairs. The U.S. Department of Energy reports that LED products generally use at least 75% less energy than incandescent lighting. Lower wattage helps, but it does not remove code obligations. Separate power supplies and low-voltage conductors when required. Use listed connectors at each transition. A licensed electrician should verify the circuit, splice access, and grounding path.
Paintable finishes can disappear against a matte wall, especially after two thin coats. Sand the surface lightly first. I have found that rushed patching exposes the raceway edge under side lighting. That mistake is easy to miss during daytime installation. Step shadows also reveal poor alignment. Recheck the line from standing height before the final coat. One practical compromise remains: a wider raceway may look less discreet, yet it allows safer conductor spacing and easier maintenance.
Top 10 Ways to Hide Wires for Surface Mounted Step Lights
Surface-mounted step lights look cleaner when their cables disappear behind trim, molding, or decorative channels. Exposed wires can distract from the staircase and collect dust along the wall. A narrow paintable cable channel works well on smooth surfaces. It creates a straight route beside the steps without cutting into finished materials.
Measure the cable path carefully before attaching anything. Leave enough slack near each light for future servicing. Small gaps matter. Wood trim can hide a cable beside the stair edge, while quarter-round molding can conceal wiring along the floor line. For a softer appearance, choose a channel that matches the wall or paint it after installation. Avoid crushing the cable under tightly fixed molding. That can damage insulation over time.
Turn off power before handling wiring, and follow applicable electrical requirements. Keep connections inside approved enclosures, not loose behind trim. On masonry walls, surface channels are often safer than deep chasing. Use suitable fasteners for drywall, wood, or concrete. My first installation looked neat, but I routed the cable too close to a corner. The trim lifted slightly and cast an obvious shadow. I corrected it by moving the route inward and adding a shallow spacer. It was a small mistake, yet it changed the finish noticeably. Leave access where practical, because hidden does not mean forgotten.
Top 10 Ways to Hide Wires for Surface Mounted Step Lights
Surface mounted step lights look cleaner when their wiring disappears into the structure. A wall cavity offers the most concealed route. Feed cable vertically behind the drywall, then exit through a small opening behind the fixture. A shallow wall channel works when full access is impossible. Patch it carefully afterward. Baseboard raceways, paintable cable covers, and recessed junction boxes provide three more options for finished interiors. Always switch off power before opening a wall, and verify cable placement with a detector.
Conduit gives wiring stronger protection in garages, masonry walls, and exposed stairways. Use rigid conduit for straight runs, flexible conduit around tight corners, and low-profile surface conduit where cutting is risky. Keep bends gentle. Pulling cable through sharp turns can damage insulation. I once planned a perfectly hidden route that ignored a support stud. The correction added time, but it prevented unsafe drilling. Local electrical requirements may also limit cable types, box locations, and burial depth, so a qualified electrician should review uncertain installations.
Outdoor steps need protection from rain, impact, and condensation. A weather-resistant enclosure can hide the connection point, while sealed cable glands protect entry holes. Add a downward-facing drip loop before the cable enters the box. Conduit buried below grade, conduit fixed beneath the stair edge, and a dedicated enclosure complete the ten methods. Use corrosion-resistant fasteners and leave enough slack for fixture maintenance. A neat installation is useful, but accessibility still matters.
| No. | Wire-Hiding Method | Best Application | Installation Approach | Protection Level | Access for Repairs | Important Considerations |
|---|---|---|---|---|---|---|
| 1 | Inside a wall cavity | New drywall, framed partitions, and accessible stud walls | Route low-voltage cable vertically or horizontally between framing members, then bring it through a low-voltage mounting box or wall plate. | High when protected from fasteners and enclosed correctly | Moderate; access may require removing the fixture or opening the wall | Use cable protection plates where wiring passes close to the face of studs. Do not conceal unapproved mains wiring inside a wall. |
| 2 | Flexible or rigid conduit | Exposed masonry, concrete, timber, and retrofit installations | Run the cable inside appropriately sized conduit and secure it with matching clips, saddles, or concealed fittings. | High; provides mechanical protection and helps resist moisture when rated for the location | High; cable can usually be inspected or replaced without opening the wall | Select conduit and fittings rated for indoor, damp, wet, UV-exposed, or buried use as applicable. Conceal it in a shallow chase where appearance matters. |
| 3 | Surface-mounted cable raceway | Finished walls where cutting or chasing is not practical | Install a paintable or color-matched raceway along the wall, then route the cable inside its removable cover. | Medium to high, depending on the raceway rating and location | Very high; the cover can normally be removed for inspection | Use only products suitable for the cable type and environment. Keep joins accessible and avoid placing raceway where it can be struck. |
| 4 | Recessed wall chase | Brick, block, plaster, or concrete walls during renovation | Cut a narrow channel, install approved cable protection or conduit, and repair the surface with compatible patching material. | High when the cable is enclosed and the chase is properly restored | Low; future access may require removing the fixture or reopening the chase | Check for structural elements, plumbing, and existing electrical services before cutting. Seal and finish the chase to prevent moisture entry. |
| 5 | Behind trim or molding | Stair stringers, baseboards, door casings, and decorative wall trim | Create a protected channel behind or beside the trim and route the cable to each light without sharply bending it. | Medium; depends on protection from nails, screws, impact, and moisture | High if the trim is removable | Do not allow fasteners to penetrate the cable. Maintain the cable’s minimum bend radius and leave service slack at each fixture. |
| 6 | Inside a stair stringer or handrail | Wooden stairs and handrails with sufficient internal space | Drill a carefully planned cable passage or use a purpose-built channel before the stair components are closed or installed. | Medium to high when the cable is protected and clear of structural fasteners | Low to moderate | Avoid weakening structural members. Plan the light spacing, cable route, and driver location before drilling. |
| 7 | Under a stair tread or riser cover | Stairs with removable tread, riser, or underside panels | Route the cable through a protected channel beneath the tread or behind the riser, then connect to the rear of each surface fixture. | Medium; extra protection is needed against abrasion and impact | Moderate to high if panels are designed for removal | Keep cable away from tread edges, moving parts, sharp surfaces, and areas exposed to cleaning water. |
| 8 | Outdoor-rated junction box or enclosure | Exterior steps, decks, retaining walls, and exposed connection points | Place the driver, junctions, or cable transitions inside an appropriately rated enclosure with sealed cable entries. | High when the enclosure, glands, and cover are rated for the exposure | High; connections remain serviceable when the cover is accessible | Mount above likely standing water, use weather-resistant fittings, provide drainage where required, and follow the enclosure’s environmental rating. |
| 9 | Below-grade conduit or direct-burial cable route | Garden steps, pathways, landscape walls, and detached outdoor areas | Run outdoor-suitable cable through approved underground conduit or use cable specifically listed for direct burial, then rise inside conduit at each light. | High when burial depth, warning protection, and cable listing meet local requirements | Low; excavation may be required for repairs | Confirm local burial-depth requirements, mark the route, protect risers from impact, and avoid placing joints underground unless specifically permitted. |
| 10 | Behind a removable access panel | Hollow stair walls, cabinetry, utility spaces, and service voids | Route the cable through the concealed void and position the driver or connections behind a labeled, removable panel. | Medium to high, depending on enclosure and cable protection | Very high; connections can be inspected without damaging finished surfaces | Keep the access area dry, ventilated where required, and free from stored materials. Secure cables so they cannot contact sharp edges or moving components. |
Planning note: Low-voltage step-light wiring is commonly routed from a remote driver or transformer, while any mains-voltage connection should be installed, enclosed, and inspected according to applicable electrical codes by a qualified electrician.
Top 10 Ways to Hide Wires for Surface Mounted Step Lights
A clean step-light installation begins with a planned wire path. I mark each fixture location before drilling. Then, I route low-voltage cable inside paintable raceway, shallow channels, or matching trim. Keep the cable away from sharp masonry edges. Leave a small service loop behind every light. It makes future testing easier.
The finish should look intentional, not merely hidden. I fill fastener holes, sand the surface, and apply two thin coats of matching paint. Cable clips should sit firmly without crushing insulation. The U.S. Department of Energy reports that LED lighting uses at least 75% less energy than incandescent lighting and lasts up to 25 times longer. That efficiency still depends on reliable connections. I check polarity, tighten terminals, and protect outdoor joints inside rated enclosures. A beautiful cover cannot repair a loose splice.
Tips: Test before painting. Test again afterward. Use a multimeter to confirm voltage at the first and last fixture. Walk the steps in darkness and check for glare, dead spots, or uneven brightness. The Illuminating Engineering Society recommends evaluating visual comfort and uniformity, not brightness alone. I sometimes find one light slightly misaligned after finishing. Correcting it feels tedious, but it prevents a visibly uneven result. Follow the installation instructions and applicable electrical requirements for the site.
This comparison ranks common wire-concealment methods by practical installation effort. Lower scores generally mean faster routing and simpler finishing, while higher scores usually require more surface preparation, cutting, patching, or access planning.
Finishing and testing tip: Secure every cable before closing the route, keep connections accessible where required, restore the surface neatly, and test polarity, voltage, brightness, and switch operation before completing the installation.
: It routes cables without opening finished walls. A straight channel looks cleaner.
Measure the full path before cutting. Mark a level line beside the stair trim. Check it from standing height.
Yes, many paintable channels accept two thin coats. Lightly sand the surface first. Matte paint can reduce visibility.
Step shadows and side lighting reveal small deviations. Daylight may hide them. Evening lighting often will not.
Leave room for conductors, fittings, and future servicing. Crowded channels create heat and complicate repairs. Wider can be safer.
Yes, wood trim, quarter-round molding, and decorative channels can conceal the route. Avoid crushing the cable under tight molding.
Keep connections inside approved enclosures. Do not leave loose splices behind trim. Access should remain practical.
Turn off power before handling wiring. Use suitable fasteners for drywall, wood, or masonry. Follow applicable electrical requirements.
A licensed electrician should verify the circuit, grounding path, conductor separation, and splice access. This step is easy to skip.
Do not route the cable too close to a corner. Trim may lift and cast a visible shadow. Small changes improve the finish.
Hiding wires for surface-mounted step lights begins with a careful assessment of the wall, the light locations, and the safest wiring route. Plan the layout first, then choose a method that matches the surface and environment. Paintable surface-mounted raceway can provide a neat, accessible path while blending into the wall after finishing. For a more decorative solution, cables may be concealed behind trim, molding, or purpose-built channels that complement the surrounding design.
In some installations, wiring can be placed inside suitable wall cavities, protective conduit, or weather-resistant outdoor enclosures, provided the structure and local requirements allow it. The key is to protect cables from moisture, impact, heat, and accidental pulling. After routing the wires, secure every connection, fill or cover visible gaps, and apply a matching finish for a clean appearance. Finally, test each step light, verify consistent operation, and confirm that all wiring is safely protected. This practical approach explains how to hide wires for surface mounted step lights while maintaining both appearance and reliability.

Jable Light