Slim LED lights offer a clean, low-profile way to brighten rooms with limited ceiling space. Many China-made models include compact housings, remote drivers, and spring clips that fit common drywall openings. Choosing well matters. Check the product’s cutout size, dimmer compatibility, color temperature, and installation instructions before buying. A warm white option can soften a bedroom, while neutral white often suits kitchens and work areas. Small details matter.
This guide explains how to install slim led lights in a drywall ceiling, from planning fixture locations to testing the finished layout. You’ll learn how to measure spacing, locate joists and existing wiring, mark cutouts, and connect compatible components. A paper template and pencil help keep openings aligned; a vacuum can control drywall dust. Turn off the circuit at the breaker and verify power is off before handling wires. Never guess about wiring. If the circuit, insulation requirements, or local electrical rules are unclear, pause and ask a qualified electrician. Follow the fixture manufacturer’s instructions, especially for driver placement and clearance around insulation. Drywall edges can crumble, even with careful cutting. That happens. A test opening in a hidden area may prevent a larger repair, though it is easy to overlook when planning. With careful measurements and suitable fixtures, installation can be straightforward—and the light can look intentional, not simply added.
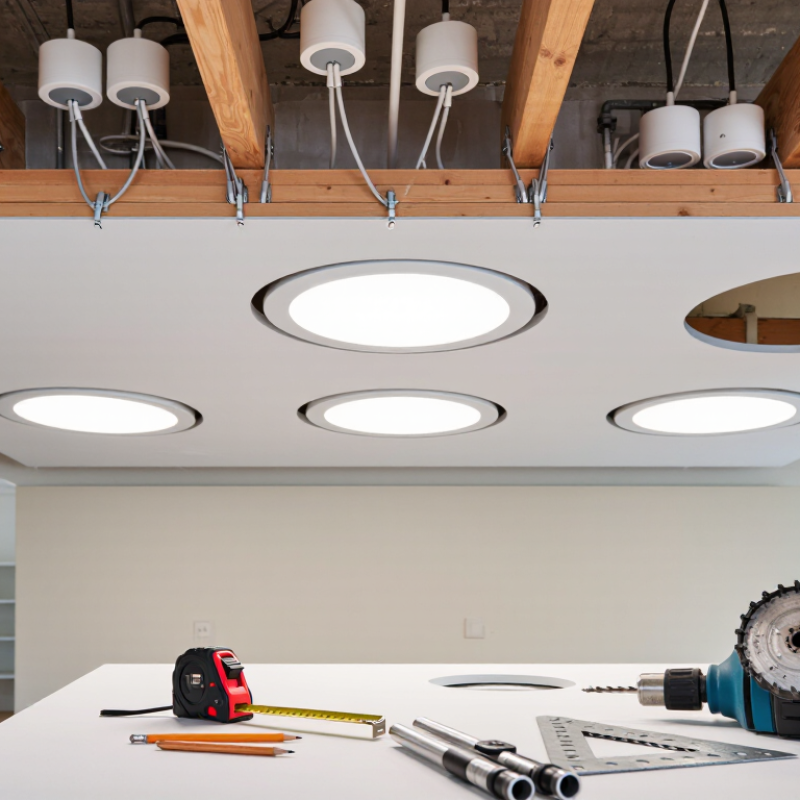
Selecting Slim LED Lights for Drywall Ceilings
Slim LED lights suit shallow ceiling cavities, but “low profile” does not mean every model fits every ceiling. Check the fixture’s required clearance, cutout diameter, and junction-box arrangement against the actual joist space. Depth matters. For insulated ceilings, confirm the fixture’s insulation-contact rating and follow its installation instructions. A paper template helps mark the opening, though even a small cutting error can leave a visible gap.
Choose light output and color temperature for the room, not just the wattage. Around 2700–3000 K gives bedrooms and living areas a warmer look; kitchens often benefit from a neutral white. A high color-rendering index, such as CRI 90 or above, can help food and finishes appear more natural. Check dimmer compatibility before buying. It is an easy detail to overlook, and flicker can be frustrating.
The U.S. Department of Energy’s Energy Saver guidance says LEDs use at least 75% less energy and can last up to 25 times longer than incandescent lighting. Those figures are broad comparisons, not a guarantee for every slim downlight. Compare the fixture’s rated lumens, wattage, and expected life on its product documentation. Measure twice. I would also avoid choosing solely by the thinnest housing; a slightly deeper fixture may offer better thermal management or easier wiring, depending on the ceiling.
As a first-pass layout, space lights approximately as far apart as the ceiling is high: for example, about 8 feet apart in an 8-foot ceiling. This is a planning rule of thumb, not a code requirement. Adjust for the room layout, desired brightness, ceiling obstructions, and the light’s installation instructions. Before cutting drywall, confirm the cutout size and required clearance for both the fixture and its driver.
Before cutting the drywall, measure the space above the ceiling at several points. Slim LED fixtures still need room for their housing, driver, and wiring. A joist, pipe, or duct can make a chosen spot unsuitable. Check the fixture instructions for required clearance; do not assume every slim light fits a shallow cavity. A tape measure and a small inspection opening can prevent a much larger repair.
Look for insulation and other materials near the proposed opening. Use a fixture specifically rated for contact with insulation if it will be covered, and follow its listed installation conditions. Keep the driver accessible as directed. Not sure what is above? Pause and inspect with a borescope or from an accessible attic. Guessing is not a plan.
Electrical safety comes before convenience. Turn off the correct breaker, then verify the wires are de-energized with a properly rated tester. A wall switch alone is not enough. Check that the circuit, wiring, and junction-box arrangement match the fixture instructions and local requirements. If wires are damaged, crowded, or unfamiliar, stop and call a qualified electrician. I once thought a clear-looking spot was ready; a hidden cable changed that. Measure again. Safe work can feel slower, but drywall is harder to put back neatly.
Planning and Marking the Light Locations
Start with the room’s tasks, not an evenly spaced grid. Sketch the ceiling, then mark cabinets, counters, sinks, door swings, and joists. For a kitchen, IES residential lighting guidance gives a useful planning reference: about 30–50 foot-candles for general ambient light, with higher levels for detailed work. Treat these as design targets, not guarantees; finishes, ceiling height, and fixture optics affect the result. Check the fixture’s photometric data and calculate expected light at the work surface. Small differences matter.
Mark locations with painter’s tape before cutting. Keep downlights clear of joists, ducts, and wiring, and avoid placing a light directly behind someone working at a counter. A simple spacing sketch helps, but equal spacing can still leave shadows under cabinets. I have found it useful to stand where people actually work and check the marks from that view. Mark twice. Then confirm each opening against the fixture cutout and the ceiling framing. ANSI/IES RP-11-20, Lighting for Interior and Exterior Residential Environments, emphasizes lighting suited to residential tasks; its recommendations should be adapted to the room rather than copied blindly. I would still revise a layout after seeing a full-size mock-up. It is easy to miss a dark patch on paper.
Before cutting, confirm the ceiling cavity is clear of joists, pipes, ducts, and existing cables. Use a stud finder, then inspect above the ceiling where access allows. Mark each opening with the fixture template, keeping spacing consistent. Drill a small pilot hole first; a bent wire can help check for hidden obstructions. Cut slowly with a drywall saw, supporting the cutout to prevent torn paper edges. A tidy circle matters.
Turn off power at the breaker and verify the circuit is de-energized with a suitable tester. Route the supply cable through the opening without pinching it against framing or sharp metal. Leave enough slack for connections, but avoid loose coils above the ceiling. Follow the fixture instructions and local electrical requirements. Ask a qualified electrician if the wiring, grounding, or circuit capacity is uncertain. The U.S. Department of Energy reports that LEDs can use up to 90% less energy than incandescent lighting. Lower wattage does not remove the need for sound wiring.
Tips: Keep a vacuum nearby, wear eye protection, and test-fit one opening before cutting the rest. A slightly imperfect hole is easy to make worse. Check twice.
With slim LED lights, careful wiring matters more than speed. Turn off the circuit at the breaker and verify the wires are de-energized with a suitable tester. Follow the light’s wiring diagram and connect conductors using the supplied connectors or approved equivalents. Keep each connection fully inside the junction box, with no bare copper exposed. If the wiring differs from the diagram, stop and ask a qualified electrician. Guessing is not worth it.
Before lifting the fixture into the drywall opening, arrange the wires so they cannot be pinched. Close the junction-box cover, then gently squeeze the spring clips and guide the light into place. The clips should press firmly against the back of the drywall. Don’t force the trim; a crooked opening or trapped wire can leave the light loose. Small details matter.
Test the lights before finishing the room. Restore power and switch them on while you can still inspect their seating. Check for steady illumination, unusual buzzing, or flickering, especially when using a dimmer. A compatible dimmer is essential. If a light flickers, turn power off before checking connections, and seek professional help if the cause is unclear. I’d allow extra time here; rushing this check is an easy mistake.
Measure the cavity, cutout diameter, and space for the driver and wiring. Check for joists, pipes, or ducts above each planned opening. A paper template helps. Small errors can leave visible gaps.
Only if the fixture is rated for insulation contact and installed as directed. Keep the driver accessible when required. If you cannot inspect the space above, pause and check before cutting.
Warm white, around 2700–3000 K, often suits bedrooms and living areas. Kitchens may look clearer with neutral white. Color can feel different on your walls, so test a sample if possible.
A CRI of 90 or higher can help food, paint, and wood finishes look more natural. It is not the only factor. I once focused too much on brightness and missed how the colors appeared.
Mark counters, sinks, cabinets, joists, and door swings on a ceiling sketch. Use painter’s tape to test locations from the places where people work. Equal spacing can still leave shadows.
Confirm that the light and dimmer are compatible. Otherwise, flicker or uneven dimming may result. A quick check now can save an annoying return visit.
LEDs generally use much less energy than incandescent lights, and some can last much longer. Actual results vary. Compare rated lumens, wattage, and expected life rather than relying on broad figures.
Turn off the correct breaker and verify the wires are de-energized with a properly rated tester. A wall switch is not enough. Stop if wiring looks damaged, crowded, or unfamiliar, and contact a qualified electrician.
This guide explains how to install slim LED lights in a drywall ceiling, from choosing suitable fixtures to checking that the ceiling can accommodate them. Before starting, measure the available clearance above the drywall and confirm that the electrical supply is switched off and safe to work with. Plan the light positions carefully, allowing for an even layout and checking for ceiling supports, wiring, or other obstructions before marking each opening.
Once the locations are confirmed, cut openings to match the fixture requirements and prepare the wiring according to the installation instructions. Connect each light securely, fit it into the ceiling, and restore power only after all connections have been checked. Finally, test the lights to make sure they operate correctly and sit neatly in the drywall.

Jable Light