Under cabinet puck lights enhance kitchen ambiance and functionality. Many homeowners seek ways to improve lighting without damaging cabinetry. Recent surveys indicate that approximately 70% of homeowners prefer easy installation methods. This raises a common question: how to install under cabinet puck lights without drilling?
Options abound, from adhesive strips to magnetic mounts. Each method offers unique benefits and limitations. Adhesive strips allow for quick setup but may not support heavier lights. Magnetic mounts offer flexibility but require compatible fixtures.
Research reveals a growing trend toward DIY lighting solutions. A report by the American Lighting Association states that 45% of consumers are interested in DIY updates to their home lighting. While these methods minimize risks to cabinetry, they may not offer the same permanence as traditional installation. This invites reflection on long-term satisfaction versus initial convenience. Exploring different options helps ensure an informed decision for every homeowner.
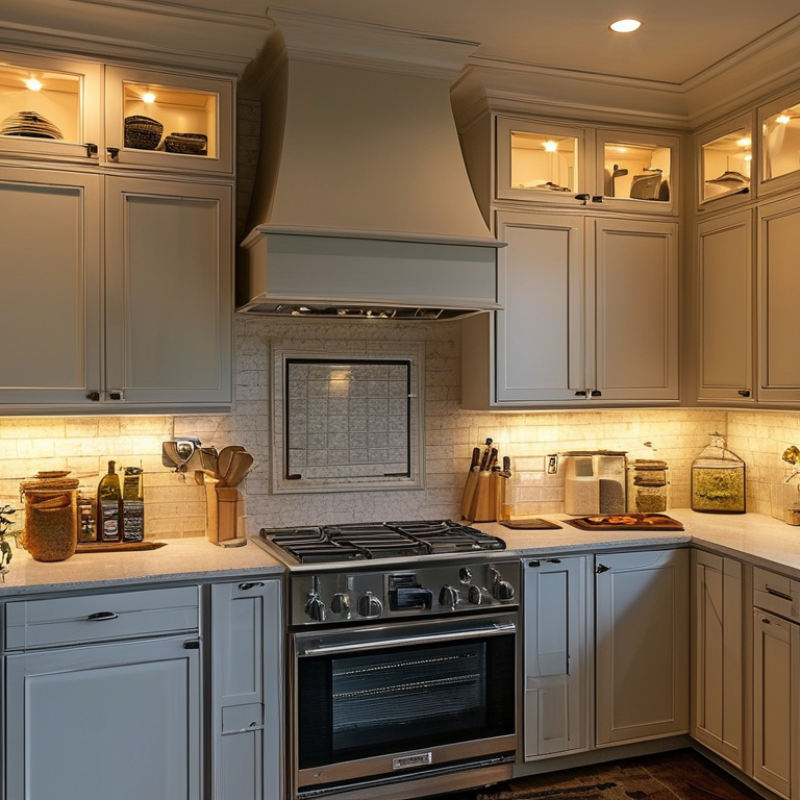
Under cabinet puck lights are a practical solution for improving kitchen lighting. They provide focused illumination, enhancing functionality and ambiance. According to a report by the American Lighting Association, proper lighting can increase a kitchen's usability by up to 30%. Installing these lights without drilling can be advantageous for renters and DIY enthusiasts. Using adhesive mounts or magnetic strips allows for quick and damage-free installation.
Choosing the right puck lights can also impact energy consumption. LED puck lights are popular due to their low energy use and long lifespan. The U.S. Department of Energy states that LEDs use at least 75% less energy than traditional incandescent lights. This not only reduces utility bills but also contributes to a more sustainable household. However, not all lights provide the same brightness. Consumers should compare lumens instead of watts when selecting lighting.
While installation appears straightforward, it can have its challenges. Ensuring proper placement requires measuring and planning. Poorly installed lights may lead to uneven lighting, which can be frustrating. Some users may find themselves repositioning lights multiple times before achieving the desired effect. This trial-and-error process can be time-consuming but ultimately helps in achieving the best layout for optimal lighting.
When it comes to installing under cabinet puck lights, drilling holes may not always be ideal. Fortunately, several non-drilling methods exist that make it easier for anyone to brighten up their kitchen. Adhesive mounting strips are one popular choice. These strips are easy to apply and can hold weight effectively, allowing you to reposition the lights if necessary.
Magnetic bases offer another creative solution. These bases attach securely to the underside of cabinets, providing flexibility. You can easily remove the puck lights for maintenance or battery changes. It's a convenient method, but checking the strength of the magnets regularly is essential. You don’t want your lights to fall unexpectedly.
For a seamless look, consider using hook-and-loop tape. This option allows you to adhere lights while maintaining an easy removal process. Still, it’s crucial to ensure a clean surface before applying any adhesive. Dust or grease can affect adhesion. Be prepared for some trial and error as you find the best approach for your specific needs.
When considering the installation of under-cabinet puck lights, gathering the right tools and materials is crucial. Experts suggest having a solid plan before starting. Commonly used tools include adhesive strips or mounting tape, a measuring tape, a pencil, and scissors. These tools allow for a clean installation without the need for drilling into cabinetry.
Many homeowners overlook the importance of verifying the light placement before sticking anything down. A report from the American Lighting Association notes that proper placement can enhance both functionality and aesthetics by up to 50%. It’s beneficial to explore various layouts using temporary tape to visualize the final look.
Tips for successful installation: First, ensure your surface is clean and dry. This step plays a vital role in the adhesion process. Second, consider light placement carefully. Avoid areas with possible obstruction. Lastly, check the power source to confirm accessibility. This preparation prevents potential frustrations during installation. Remember, each step might require slight adjustments—perfection is often a moving target.
| Item | Description | Quantity | Estimated Cost |
|---|---|---|---|
| Puck Lights | LED lights that fit under cabinets for task lighting. | 6 | $30 |
| Adhesive Tape | Strong double-sided tape for mounting lights without drilling. | 1 roll | $5 |
| Power Source | Extension cord or battery pack, depending on light type. | 1 | $15 |
| Scissors | For cutting adhesive tape to appropriate lengths. | 1 pair | $3 |
| Level | Tool to ensure lights are mounted straight. | 1 | $10 |
Installing under cabinet puck lights can transform your kitchen. Many homeowners prefer adhesive options to avoid drilling. This guide will help you install puck lights effectively.
Choose a clean surface for installation. Wipe the area with rubbing alcohol. Measure carefully where each puck light will go. This prevents awkward placements. A good layout enhances light distribution. Mark positions lightly with a pencil to avoid permanent marks.
When using adhesive pads, ensure they are high-quality. Apply the pads to the lights first. Press firmly on the lights for several seconds. This ensures better adhesion. If the light feels loose after a few hours, reapply it.
Tips: Use a level to keep lights straight. Avoid placing lights too close to walls; this can create shadows. Consider the amount of light needed. Too many lights can cause glare, while too few might not illuminate effectively. Always have the lights even for a professional look. Adjustments are sometimes needed after installation; don't overlook this.
When positioning puck lights under cabinets, consider the layout of your kitchen. A well-researched report from the American Lighting Association indicates that proper positioning can increase perceived space in kitchens by up to 30%. The distance between each light is crucial. Ideally, keep them 24 to 36 inches apart. This ensures even light distribution, reducing dark spots.
Using adhesive strips or magnetic mounts can simplify installation. These methods do not require drilling, which is beneficial for renters. However, it’s essential to secure your puck lights properly. An inadequate bond can lead to lights falling, causing damage or injury. Always clean surfaces before applying adhesives.
Wiring should be discreet, ideally hidden within cabinetry. A study by the National Electrical Contractors Association emphasizes the importance of professional wiring. Incorrectly placed wires can be a fire hazard. Despite this, many opt for DIY methods without adequate knowledge. It’s a reminder that while DIY looks appealing, safety must always come first. An improper install can lead to future issues, such as flickering lights or even system failure.
: Clean the area with rubbing alcohol. A clean surface ensures better adhesion.
Measure carefully to avoid awkward placements. Proper layout improves light distribution significantly.
Yes, use high-quality adhesive pads. Apply them firmly for better adhesion after installation.
Ideally, place lights 24 to 36 inches apart. This reduces dark spots and ensures even lighting.
While DIY is tempting, improper wiring can be risky. Consider professional installation for safety.
If they seem loose, reapply the adhesive pads. Ensure they are secure to avoid falling.
Yes, too many lights can create glare. Balance the number of lights for effective illumination.
Yes, adjustments may be necessary for a professional finish. Don’t overlook aligning them evenly.
Proper placement can enhance the perceived space in your kitchen. Light positioning matters significantly.
An improper install may lead to flickering lights or system failure. Safety is a priority.
This article provides a comprehensive guide on how to install under cabinet puck lights without drilling, presenting a variety of non-invasive methods to enhance kitchen lighting. Understanding the benefits of puck lights is crucial, as they effectively illuminate workspaces while adding aesthetic value to your cabinetry.
The article explores various non-drilling installation techniques, emphasizing the importance of gathering the right tools and materials beforehand. A detailed, step-by-step guide is provided for adhesive installation, ensuring a secure and straightforward process. Additionally, tips for efficient positioning and wiring of the puck lights are included, helping readers achieve optimal results without the need for drilling, making the installation process accessible for everyone.

Jable Light